Your Minecraft world is a blank canvas, aching for an epic tale. Imagine the crunch of snow underfoot, the scent of woodsmoke, and the distant call of a longboat horn echoing through fjords. You're not just building structures; you're forging a legend. Crafting Viking Village & Settlement Layouts in Minecraft transcends simple block placement—it's about creating a living, breathing testament to Norse ingenuity, resilience, and community spirit. It's an opportunity to immerse yourself in a rich historical aesthetic, whether you're building a solitary survival haven or a bustling hub for your entire server.
Think beyond mere aesthetics. A well-planned Viking settlement serves as a formidable defensive position, a thriving economic center, and a spiritual heart for your virtual world. It’s where functionality meets lore, where every longhouse, every watchtower, and every cobblestone path tells a story.
At a Glance: Crafting Your Viking Stronghold
- Start with a Vision: Decide if you want a cozy hamlet, a sprawling trading hub, or a fortified coastal village.
- Embrace the Terrain: Vikings adapted to their environment. Let hills, rivers, and coastlines dictate your layout.
- Core Structures First: Prioritize a Great Hall and essential Longhouses, then expand with specialized buildings.
- Functionality is Key: Integrate workshops, farms, and defensive structures seamlessly into your design.
- Material Mastery: Stick to a cohesive palette of wood (dark oak, spruce), stone, and cobblestone for authenticity.
- Detailing Matters: Add flags, torches, custom furniture, and pathways to bring your settlement to life.
- Iterate and Expand: Your village isn't static; allow it to grow organically over time, just like real settlements.
Why Forge a Viking Settlement in Your Minecraft World?
Beyond the undeniable cool factor, building a Viking settlement offers a multifaceted gameplay experience. It's not just about aesthetics; it's about creating a functional, defensible, and immersive base that enhances every aspect of your Minecraft journey.
First, survival and defense. With sturdy walls, strategic lookout points, and well-placed longhouses providing shelter, you're better equipped to withstand the nightly onslaught of hostile mobs or even PvP raids. A fortified settlement transforms a vulnerable spawn point into a secure sanctuary.
Second, community and role-playing. For multiplayer servers, a Viking village becomes a natural hub for collaboration, trade, and shared adventures. Imagine bustling markets, communal feasts in a Great Hall, and coordinated expeditions from a shipwright's dock. It fosters a sense of belonging and narrative.
Finally, creative expression and immersion. The Norse aesthetic is rich with detail, offering endless opportunities for unique architectural flourishes and environmental storytelling. From intricate carvings on a longhouse to a shrine nestled by a waterfall, every block you place contributes to a vibrant, historical tapestry. It's a deeply satisfying creative challenge that yields truly epic results.
Core Principles: Building Like a Norse Architect
Before you even place your first block, understanding the underlying principles of Viking settlement design will elevate your build from a collection of houses to a coherent, defensible, and vibrant community.
Functionality Shapes Form
Viking settlements weren't built for show; they were built for survival. Every structure had a purpose. Your Great Hall isn't just a pretty building; it's where your community gathers, feasts, and makes crucial decisions. Your Longhouses aren't just homes; they might include animal pens or storage. As you design, always ask: What is this building's primary role, and how can its design enhance that? This utilitarian approach will lend authenticity to your settlement.
Embrace the Lay of the Land
Forget flat, gridded layouts. Real Viking settlements adapted to the natural contours of the land. Hills offered defensive advantages and stunning views. Rivers and coastlines provided transport, fishing, and trade opportunities. Instead of terraforming extensively to create a flat building pad, let the existing Minecraft terrain inspire your layout. Build into hillsides, alongside rivers, or perched precariously on cliffs. This organic approach creates dynamic and realistic settlements.
Defense First, Always
A Viking village was often a stronghold. Think about choke points, natural barriers, and strategic sightlines. Position your more robust structures, like the Fortress of the North, at vulnerable points or on high ground. Consider how walls, watchtowers, and the overall placement of buildings can create a defensive perimeter that protects your inhabitants and resources. Don't forget that water can be a natural barrier, making coastal or island settlements inherently more defensible.
The Heartbeat of the Community: Central Hubs
Every thriving Viking settlement had a central gathering place. This was often the Great Hall, a symbol of unity and strength. Place this structure in an accessible, prominent location, ideally with plenty of open space around it for markets, training, or celebrations. A central fire pit, or even a main courtyard, can also serve as a communal focal point, drawing pathways and activity towards it.
Resource Management and Production
A village needs to sustain itself. Plan areas for resource gathering and processing early on. This means dedicated spaces for farming, logging, mining, and crafting. An Artisan Workshop should be easily accessible from resource storage, while a Trading Post might be closer to major pathways or docks. Thinking about the flow of goods and people will make your settlement feel genuinely lived-in.
Aesthetic Cohesion and Storytelling
While functionality is paramount, aesthetics tie everything together. Choose a consistent material palette—dark oak, spruce, stone bricks, cobblestone, and stripped logs are excellent choices for a Norse theme. Use similar roof designs and decorative elements. Think about the story your settlement tells: Is it a harsh, isolated outpost? A prosperous trading town? A spiritual haven? Let this narrative guide your architectural choices and detailing.
Essential Structures: The Building Blocks of Your Saga
With the core principles in mind, let's delve into the specific structures that will form the backbone of your Viking settlement. Each serves a distinct purpose, contributing to the overall functionality, defense, and atmosphere of your world.
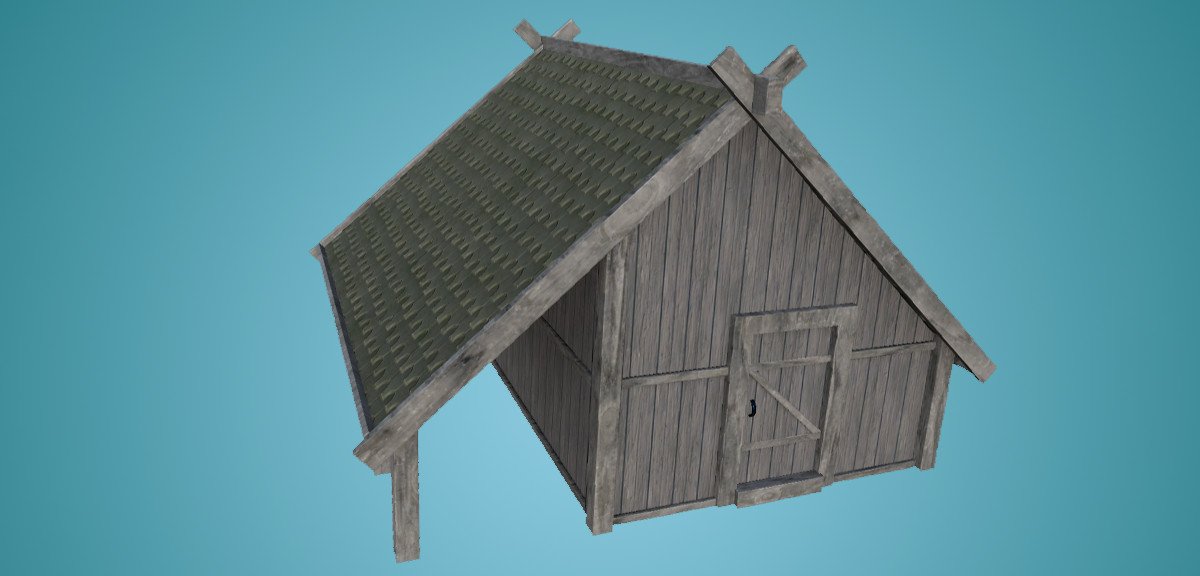
The Quintessential Longhouse: Home and Hearth
No Viking settlement is complete without the iconic Longhouse. This isn't just a house; it's the very definition of a Viking home and a primary social hub. Its elongated shape, often featuring sturdy wooden beams and a steeply pitched roof, should be your starting point for residential buildings.
- Design Elements: Focus on intricate carvings on the exterior, perhaps using dark oak or spruce planks for framing and lighter wood for infill. A spacious interior is key, often open-plan, with a central fire pit acting as both a heat source and a cooking area. Smoke should exit through a roof vent or a small chimney.
- Interior Details: Furnish with rustic wooden tables, benches, and beds. Consider adding animal pens directly attached to one end for warmth and security, a historical Viking practice. This dual-purpose design highlights efficiency and practicality.
- Placement: Longhouses can be clustered together to form residential districts or spread out, adapting to the terrain. For a more organized feel, consider arranging them along a main pathway leading to the Great Hall.
The Great Hall: Your Community's Roaring Heart
The Great Hall is the crowning jewel of any Viking settlement, a potent symbol of unity, leadership, and strength. It's where the community gathers, decisions are made, and feasts are held. This should be your largest and most impressive structure, strategically placed at the center or most prominent point of your village.
- Grandeur and Scale: Aim for a high ceiling with exposed grand wooden beams that reach up to the apex of the roof. The sheer size should be imposing, reflecting its importance.
- Feasting and Fellowship: A long feasting table stretching down the center is essential, surrounded by benches or chairs. Decorate liberally with banners in your clan's colors, roaring torches or lanterns for ample light, and a massive fireplace (perhaps a central pit or an imposing hearth against a wall).
- Ceremonial Touches: Consider a raised platform at one end for a chieftain's seat or a speaker's dais. Armor stands displaying custom-made Viking armor can add to the martial atmosphere. This is the stage for your world's epic tales.
Specialized Structures: Expanding Your Viking World
Once the core longhouses and the Great Hall are established, it's time to diversify your settlement with buildings that cater to specific needs, enhancing functionality and deepening immersion.
Defiance and Defense: The Fortress of the North & Hilltop Lodge
Protecting your people and resources is paramount.
- The Fortress of the North: This isn't just a watchtower; it's a statement of defiance. Build it with sturdy stone walls—cobblestone, stone bricks, deepslate bricks all work well—and imposing, broad towers. Include lookout points with archer slits or open platforms for defensive ranged attacks. A grand, reinforced entrance gate adds to its intimidating presence. This fortress can serve as your primary survival base, a last stand point, or a commanding landmark.
- The Hilltop Lodge: Strategically placed on the highest accessible point of your settlement, this lodge offers breathtaking views and a critical tactical advantage. While primarily a residence, its elevated position makes it an excellent secondary lookout. Design it as a wooden structure with large windows and balconies, allowing for surveillance of the surrounding lands. The interior should still be cozy, with a fireplace, as it might also serve as a chieftain's private quarters or a scout's base.
Trade and Craft: The Artisan Workshop & Trading Post
A thriving settlement needs industry and commerce.
- The Artisan Workshop: Every Viking worth their salt crafts their own tools and weapons. This structure is a dedicated space for creation. Build it with a mix of stone and wood, indicating its utilitarian purpose. Inside, meticulously arrange crafting tables, anvils, grindstones, and a dedicated forge (a series of blast furnaces or campfires can simulate this). Don't forget ample storage chests for raw materials and finished goods. Shelves laden with tools and ingots complete the look.
- The Trading Post: This is where goods change hands and tales are swapped. Design it to be welcoming and easily accessible, perhaps at the edge of town or near a main thoroughfare. Feature various stalls made from different wood types, each potentially selling specific goods. A cozy socializing area with benches and a small fire pit encourages visitors to linger. Use colorful banners, signs, and item frames to clearly indicate what's being traded. This area is perfect for integrating a server economy.
Maritime Might: The Seaside Retreat & Shipwright's Dock
If your settlement is near water, embracing the sea is essential for exploration, fishing, and trade.
- The Seaside Retreat: This build embraces the coastal lifestyle. Feature wooden docks extending into the water, with small fishing boats moored nearby. The main house should be perched on cliffs or nestled close to the shore, offering views of the open water. Incorporate fish storage barrels or chests and hanging fishing nets (created with string and wool or custom banners) for an authentic fishing village vibe. It's a serene yet productive part of your settlement.
- The Shipwright’s Dock: For any aspiring explorer or raider, a dedicated shipbuilding facility is a must. This area should include robust docks capable of accommodating larger vessels (even if they're purely aesthetic). Feature material storage sheds packed with wood, wool, and other crafting components for ships. Include areas for 'sailors' to rest, perhaps small bunkhouses or a campfire area nearby. This dock is your gateway to exploration and adventure, making it easy to Explore Viking Minecraft schematics for various longship designs.
Spirituality and Lore: The Shrine of the Gods
Viking life was deeply intertwined with their gods and beliefs.
- The Shrine of the Gods: A mystical structure dedicated to Norse deities provides a spiritual heart to your village. Adorn it with totems (custom banners on fences or armor stands), fresh flowers (from your garden or creative placement), and altars (stone blocks with specific items on top). Use a mix of stone and natural wood. For ultimate tranquility, consider building it near a natural waterfall or incorporating a meticulously crafted garden of ancient trees and mossy stones. It's a place for quiet reflection, offerings, and perhaps even in-game blessings.
Unique Challenges: Pushing Your Creative Boundaries
Sometimes, the most memorable builds come from adapting to extreme environments or integrating natural wonders. These ideas challenge conventional layouts and result in truly stunning Viking structures.
Floating Longhouse on a Frozen Lake: An Icy Innovation
Imagine a sturdy longhouse defying the elements, supported by wooden stilts above a vast, frozen lake. This build requires thoughtful planning but offers incredible aesthetic appeal, especially in snowy biomes.
- Construction: Use dark oak or spruce for the stilts, ensuring they plunge deep enough to appear structurally sound. The longhouse itself should have a steep, snow-covered roof (achieved with spruce planks, packed ice blocks, and snow layers) to shed heavy snowfall.
- Key Features: A central chimney provides a visual cue for the warmth within, hinting at a roaring fireplace. Lanterns should be strategically placed to cast a warm glow against the stark white backdrop. A small dock extending from the longhouse allows access, and a dedicated fishing hole, perhaps with a trapdoor for easy access, completes the picture of icy survival.
Cliffside Mead Hall with a Waterfall: Nature's Embrace
For a truly epic and unique Great Hall, consider carving it directly into a cliffside, allowing a natural waterfall to flow through its center. This build integrates the raw power of nature into your architecture.
- Integration: Use stone bricks and dark oak wood to blend the structure seamlessly with the rock face. The waterfall itself becomes the natural centerpiece. Design the interior so that the water flows elegantly through a central channel or a designated chamber, perhaps with bridges crossing it.
- Atmosphere: Banners, barrels, and a long feasting table are still essential, but the sound and sight of the waterfall will add an unparalleled sense of majesty and a primal connection to the land. This requires careful water management in Minecraft to avoid flooding but the result is breathtaking.
The Cozy Cottage: A Humble Haven
While grand structures define a settlement, smaller, more intimate builds provide essential warmth and character. The Cozy Cottage is perfect for individual players, new arrivals, or as quaint residential options within a larger village.
- Charm and Simplicity: Build with a harmonious blend of stone and wood, giving it a sturdy, rustic feel. Focus on a compact, efficient layout.
- Warmth and Comfort: Decorate with rustic furniture like small tables, chairs, and a warm fireplace. A small, well-tended garden for crops outside adds to its self-sufficient charm. It's a perfect starter home or a quiet retreat from the bustling Great Hall.
Layout Strategies: Arranging Your Viking Masterpiece
Now that you have your individual building blocks, how do you arrange them into a cohesive, functional, and visually appealing settlement? Your layout strategy will define the character of your village.
The Central Hub Approach
This is a classic and effective strategy. Place your Great Hall (or another significant communal building) at the very center of your chosen area. All major pathways, residential longhouses, and specialized structures then radiate outwards from this hub. This creates a natural flow, makes navigation easy, and emphasizes the importance of your communal space. It's ideal for a village that feels tightly knit and community-focused.
Defensive Perimeter First
If survival is your top priority, start by establishing your defenses. Build a strong perimeter wall, perhaps incorporating your Fortress of the North at a critical access point. Once the outer shell is secure, begin placing buildings within this protected zone. This approach ensures that everything inside is safe, but it can sometimes lead to a more rigid, less organic layout. Balance it by letting inner pathways meander.
Terraced Settlements: Conquering the Slopes
When building on hills or mountains, terracing is your friend. Instead of trying to flatten large areas, embrace the elevation changes. Build structures on different levels, connecting them with stairs, ramps, and multi-level pathways. Place your Hilltop Lodge at the very top for commanding views. This creates a visually dynamic settlement that feels naturally integrated into its environment, avoiding the blandness of flat builds.
Coastal and Riverside Layouts: Leveraging Waterways
Water is a powerful element in Viking lore and practicality. If your settlement is by a large body of water, let it dictate your design.
- Fishing and Trade: Place your Seaside Retreat and Trading Post along the water's edge, with docks extending out.
- Defense: Use the water as a natural barrier on one side, focusing your primary defenses on the land approach.
- Transport: Rivers and coastal paths become your main arteries, guiding the placement of your Shipwright’s Dock and other commerce-related buildings. This creates a distinctly maritime feel.
Sprawling vs. Compact: Defining Your Village's Vibe
- Compact Settlements: Ideal for survival or a small, close-knit community. Buildings are tightly packed, sharing walls or small courtyards. This maximizes defensibility and efficiency but can feel a bit cramped.
- Sprawling Settlements: Offers more room for expansion, farms, and open spaces. Buildings are more spread out, connected by wider paths and natural landscaping. This creates a sense of grandeur and self-sufficiency but can be harder to defend comprehensively.
Bringing It All Together: Aesthetics and Atmosphere
Beyond the structural layout, it's the finer details and environmental touches that truly breathe life into your Viking village. These elements transform mere blocks into a believable, immersive world.
Material Palettes: The Norse Aesthetic
Consistency in materials is crucial for a cohesive look.
- Primary Woods: Dark oak and spruce are indispensable. Their darker tones evoke the rugged Norse forests and provide a strong, aged appearance. Use stripped logs for structural beams and posts to add texture.
- Stones: Cobblestone, stone bricks, deepslate bricks, and even mossy cobblestone provide contrast and solidity. Use them for foundations, walls, fortifications, and pathways.
- Accent Blocks: Consider wool (for banners), concrete (for smoother walls in specific areas), various types of terracotta (for subtle color variations), and packed ice (for frozen environments or decorative elements).
- Roofs: Steep, gabled roofs are characteristic. Use spruce planks, dark oak planks, or even dark prismarine for a unique, weathered look, often capped with slabs or stairs to create definition.
Terraforming and Landscaping: Shaping Your World
Don't just build on the landscape; build with it, and enhance it.
- Pathways: Create organic pathways using dirt paths, coarse dirt, gravel, or even a mix of stone and cobblestone. Vary their width and texture to indicate main roads versus smaller footpaths.
- Custom Trees: Plant custom, larger-than-life spruce or dark oak trees around your settlement to create a sense of ancient forest.
- Water Features: Integrate existing rivers or create small streams and ponds. A small custom waterfall near your Shrine of the Gods can be particularly atmospheric.
- Crop Fields and Animal Pens: Design small, functional farms with wheat, carrots, and potatoes, often enclosed by simple fences. Animal pens for sheep, cows, and pigs add to the self-sufficient feel.
- Lighting: Utilize lanterns, campfires (for smoke and light), and torches strategically. A well-lit settlement prevents hostile mob spawns and creates a warm, inviting glow at night.
Details and Decor: The Devil is in the Draugr
It's the small touches that truly sell the illusion.
- Banners: Custom banners are your best friend for adding clan symbols, decorative patterns, and flags atop watchtowers or within the Great Hall.
- Item Frames and Armor Stands: Display weapons, shields, and tools on walls using item frames. Armor stands dressed in chainmail or custom leather armor can serve as guards or revered figures.
- Custom Furniture: Go beyond basic crafting table-and-chest furniture. Create custom tables, chairs, bookshelves, and storage units using stairs, slabs, trapdoors, and signs.
- Vegetation: Use ferns, grass, flowers, and even custom moss blocks to break up flat surfaces and add natural beauty.
- Storytelling Elements: Scattered barrels, crates, hay bales, and even subtle ruins outside your walls can hint at a deeper history or ongoing activities.
Common Pitfalls to Avoid in Your Viking Minecraft Build
Even seasoned builders can fall into traps. Steer clear of these common mistakes to ensure your Viking settlement is truly legendary.
- Ignoring the Terrain: Building a flat, symmetrical village on a perfectly leveled plain will lack character and authenticity. Embrace hills, valleys, and water.
- Lack of Material Variety: Sticking to just one or two block types can make your build look monotonous. Use a diverse, yet cohesive, palette of wood, stone, and accent blocks.
- Poor Lighting: Dark corners are an invitation for hostile mobs. Ensure adequate lighting throughout your settlement, both for safety and ambiance. Lanterns, torches, and campfires are your friends.
- No Pathways or Flow: Randomly placed buildings without clear connections will make your village feel disjointed and difficult to navigate. Plan logical paths that lead to important areas.
- Forgetting Functionality: While aesthetics are important, a Viking settlement should work. Ensure you have practical areas for crafting, storage, farming, and defense.
- Over-Detailing or Under-Detailing: Find a balance. Too much detail can feel cluttered; too little leaves your builds looking bland. Focus on meaningful details that tell a story.
- Ignoring Scale: Ensure your buildings feel proportionate to each other and to a player's size. A Great Hall should feel grand, while a cottage should feel cozy.
Your Epic Saga Awaits
Building a Viking Village & Settlement Layouts Minecraft is more than just placing blocks; it's an adventure in design, history, and creative storytelling. From the sturdy longhouses sheltering your villagers to the imposing Great Hall where sagas unfold, every structure contributes to a living, breathing world.
Embrace the challenges, experiment with different designs, and let the spirit of the Norse guide your hand. Whether you're a lone explorer seeking a secure base or a chieftain rallying a server, the principles and ideas outlined here will equip you to forge a settlement that is not only visually stunning but also functional, defensible, and deeply immersive. Your world is waiting for its Viking legend to be built—grab your axe and get to work!